
Hanging Instructions

[If your garland is in a bag- do not attempt to "pull out" the garland instead rip the bag.]
Grab your installation kit

Here's how to attach your Grab & Go Garland
-
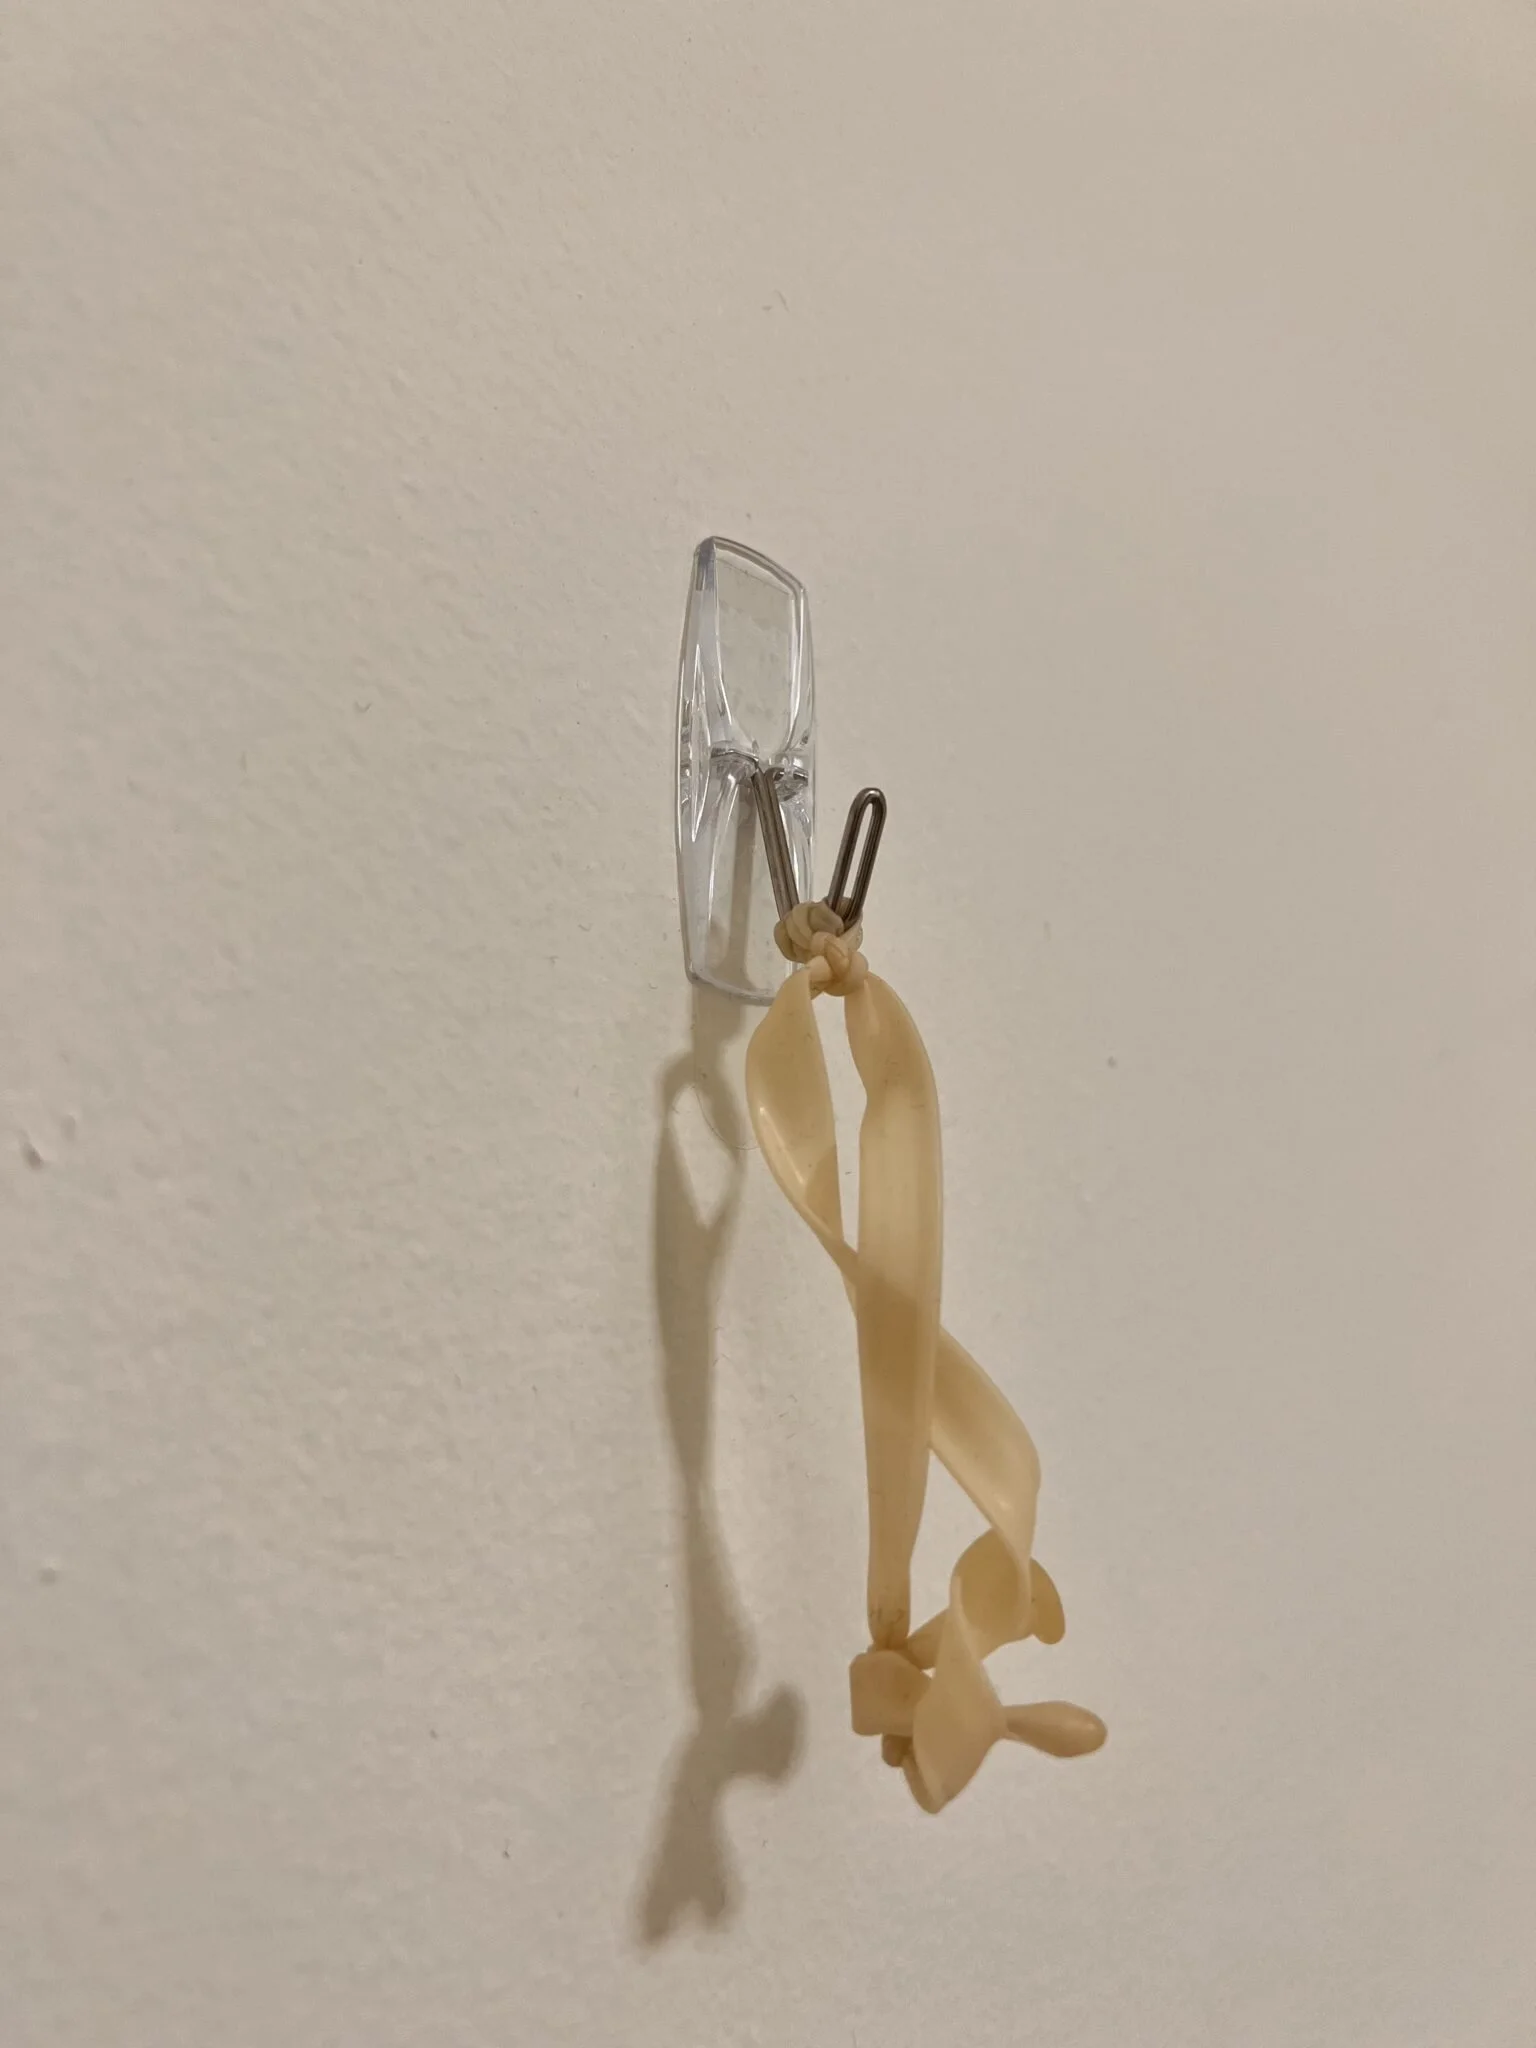
Step One: Anchor
Create an anchor point:
(Optional– use the included alcohol pads to clean the area of the wall the command hooks will attach to)
Use the included command hooks with the attached balloon “bracelet” to create an anchor point on the wall.
Make sure to hang the Command Hook 10 mins before you attach your garland to allow your command hook enough time to properly adhere.
*Here is a video we love for Command Hook removal tip*
-

Step Two: Attach
Hold the garland securely against the wall, (or have a partner help you do this).
Stretch the balloon bracelet towards the closet balloon.
-

Step Three: Secure
Gently guide the balloon bracelet around the balloon and onto the base or neck.
-

Step Four: Fluff & Finish
Most of the mini balloons can be easily repositioned, so gently adjust to achieve the look you desire.
Additional Assistance
-

Attach to an existing Anchor point
Connecting to an existing structure like a banister, railing, or curtain rod is easy.
Simply tie the included stretchy long balloons to your existing structure.
Next tie a loop at the end of the balloon creating a balloon bracelet.
Then stretch the balloon bracelet around a balloon in the garland (following steps 2-4 above)
-

Can't put a Command Hook directly on wall?
Can’t or don’t want to attach a command hook to the wall?
Lay a piece of tape safe for your wall (not included in the kit- suggestions include painters tape, 3m tape, etc)
Attached command hook to tape, the same way you would attach it to the wall.
Make sure to give your base tape and the command hook 10 mins to adhere.
Place a layer of tape at the top and bottom of the command hook.
* Note- this is not as secure as putting a command hook directly on the wall- but will support your garland, just be gentle during the install*
-

Want a video?
Need to see install in action? Check out this video we like for an example.